Thursday, December 31, 2015

Travelling Abroad with Jennifer

Today we are travelling to Europe with Jetteam member Jennifer of WearablebyDesign. Here is Jen's wonderful post and photos of her journey!

"I recently got to take a trip across Northern Europe with my husband for his work.  It was extra fun for me as I got to see cities I’d never seen before.  I thought I’d share some of the highlights with you all!
 
~~~~~~~~~~~~~~~~~~~~~~~~~~~

We landed in Munich, just to get adjust to Europe. The next day we flew to Warsaw. We spent a few days there. Munich was completely destroyed in WWII. Hitler wanted to erase the city and remake it as his own. It had 1.3 million people (of which 350,00 were Jews) prior to the war. At the end of WWII it had 1,000 people left. They knew Hitler's plans and they drew plans of the existing city in order to rebuild after the war. They did a pretty good job and it's a lovely city today. 

After the war, Poland was annexed by Russia and became part of the Soviet Union. So they weren't well off and have only lately, become thriving under independence.

Stalin built a building in the city center as a gift to the people of Poland. At the time, it was nearly the tallest building in all of Poland, but the people found it ugly and old fashioned. It has only lately become embraced.

news.yahoo.com/unwanted-gift-stalin-warsaw-palace-culture-turns-60-...

Next, we went by train to Krakow. This city is quite large and on the big and beautiful Vistula river. But the old town in the center is small and approachable. The old castle and fortifications are on a small hill overlooking the river. It was for many years part of the Hapsburg Empire of Austria and has a clearly Austrian look and feel. We stayed in the old town square and had a view of the Christmas town set up for festivities. The old St. Mary's Basilica is the best preserved, medieval style church I've ever been in. It's breathtaking! The cloth hall in the center of the square is equally breathtaking. 


And they had the best mulled wine of any I tasted throughout Europe.

Next, we went to London. We saw the Museum of London. It was terrific. Especially the exhibit of the great fire of 1666.

We had the great fortune of seeing the Dickens play "A Christmas Carol." They did a bang up job, given that they had no children in the cast and had to do time travel on stage. It was pretty true to the story which made it thoroughly satisfying and yet new spins on many aspects of the story. 


Next up, Copenhagen. We stayed directly across from the Hay Market in the town square. Given how far north we were and the date, you would have thought the weather would have been impossible. We were really lucky everywhere we went that you could always be outdoors. Their museum of the history of Copenhagen was lots of fun. It had a lot of jewelry, metallurgy, bog people, etc. Our only disappointment was the lack of Viking history. I guess Sweden has most of the loot! So that will have to be on a future list.

Back to Munich. This time we had a full day to see sights. We went to the Neues Rathaus. It was packed with people and was the location of their Christmas town. The weather was unbelievable and we sat outside the city wall at a cafe and ate lunch in the sunshine! 


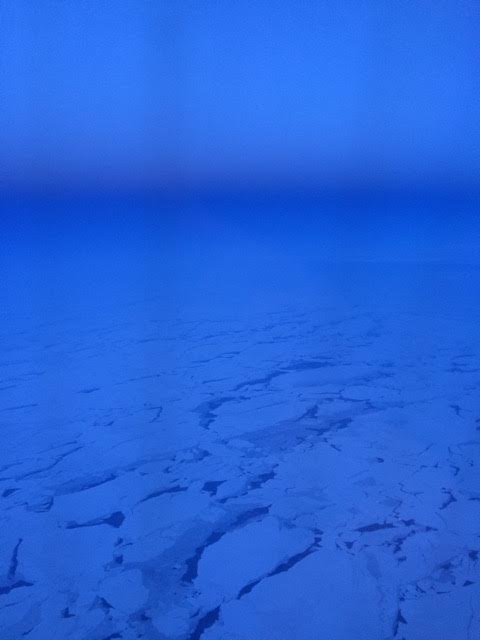
Then we made our way stateside, flying from Amsterdam directly to San Francisco going over the north pole. I got a beautiful photo showing the lack of snow (which was a bit alarming). Going east is brutal, but going west just makes for the worlds longest day. 


Thank you Jen for sharing your awesome trip to this beautiful country!!!!!!!


Saturday, December 26, 2015

What's on My Bench???

Today's episode is from JET member Gaiane of BellaVeaJewelry. She is going to discuss her creative process for a pair of earrings.

Recently I did a sketch while being inspired by Spanish Guitar Music which I love to listen to when I either draw or make jewelry. I wanted to do something unique. I showed it to my friends on Periscope, a relatively new social media platform, and everyone was excited for me to work on the piece. I told everyone that when I finished the piece I would give them the option of purchasing the piece and whoever purchased the earrings would also receive the sketch.


When I was sketching the earrings, I imagined them being made with dark vibrant colors; however, when I started working on them, the lighter colors I ended up using seemed more fitting. I love the softness of the pink freshwater pearl, the mysteriousness of the labradorite, and the sparkly pink amethyst in the center.  I almost wanted the earrings to dance. I was trying to express the strength yet beauty and softness through them.


When I finished working on the earrings, I took a quick picture of the earrings next to the sketch and posted them on my FB page.


One of my FB followers really loved the earrings and purchased them right away so she also received the sketch. Everyone actually watched on Periscope while I gave the earrings and sketch to the buyer. Here is a picture of my happy client:


What wonderful artistry Gaiane! Remember if you want to learn more about Gaiane, go to her Etsy shop, BellaVeaJewelry. In the meantime, enjoy the holiday season, and come back next week for another episode of What's on My Bench???

Thursday, December 24, 2015

Christmas Nostalgia

When I was a little girl, I made sugar cookies with my mother and decorated them. By the time I was six years old I was making them, and other cookies, on my own. I was quite the baker. Here is a picture of me at Christmas when I was three cooking in my new play kitchen in 1972: 


When I became older, (early twenties) I made cookies with my niece, Madison. The first time we made sugar cookies was for a Christmas tea she was having when she was two years old. It became an annual tradition until she became a teenager and moved on to teenager things. This is Madison at two years old:  


Over time I gained three more nieces and made cookies with them. First came Becca and we made cookies when she was about three years old as shown in this picture:  


Then came Katie and later, her younger sister, Emma: 


They are now all grown up, with the youngest, Emma, almost 17. So, now making cookies is something I do on my own again but, it is something I must do for the season to feel like Christmas. I still use the same recipe I used with my mother when I was a little girl. That recipe is now submitted in my church's cookbook:


I still add all the ingredients and beat them with the mixer. Add the flour by hand first and then mix ever so slightly with the mixer. I even sift the pre-sifted flour. Then chill the dough for a few hours before rolling it out. The idea of using commercial "pre-made" dough is heresy in my house.


This year I've used two rolling pins. The large one to roll out the dough initially and the small one to imprint some of the dough with snowflakes. The smaller pin I bought on Etsy from a shop in Poland.


These are the same cookie cutters I used when I was a child and used with each of my nieces. Some of them got lost through the years but, I was able to replace them with cutters of the same vintage I found on Etsy over the last couple of years.


I love these cookie cutters because they cut out cookies with details. As you can see with the Christmas tree cookie there are shapes on the tree for ornaments and garland. On the Christmas package there is "Merry Christmas" written on it and a bow. These details are fun to decorate after the cookies are baked.


This year I am doing something new with respect to decorating the cookies. I am not using commercial food coloring to dye the frosting. I am using "natural" coloring to dye the frosting. I am doing this because I have noticed that red food coloring bothers my head and makes my migraines worse. So I found natural coloring by ColorKitchen which is also non-GMO, gluten free, and vegan.


First I mix the white frosting in the mixer. Yes, I sift the confectioner's sugar.


The blue dye is made from Spirulina, a blue-green algae. The red dye is made from beets. The yellow dye is made from the spice turmeric. I had to mix colors to create the purple frosting and the green frosting. It took two packages of the beet red along with a couple of pinches of yellow to make the red frosting; otherwise, it is more of a pink or raspberry color.


I ended up not using the blue frosting at all. This frosting was very thick. I had to keep thinning it by adding more milk. It does have a nice glossy appearance. I think these natural colorings are worth trying again next year with some tweaking of the frosting recipe.


My nieces may now be too old to think it's cool to make cookies with a middle-aged aunt, but they, and their brothers are not above eating them. I'm sure they will be scarfed-up on Friday when they are all at our house for Christmas! Here is a picture of them from last Christmas:


Left to Right: Becca, Will, Katie, Emma, Davis, & Madison

They are precious each and every one. Enjoy your Christmas with your family & friends.

Val Swanson
Designed by Val

Saturday, December 19, 2015

What's on My Bench???

Today's episode is from JET member Gaetana Parris of Satin Doll Co. She recently visited Pinterest and it sparked an idea...

Pinterest will get you in trouble every time. My latest project is non-jewelry related and as soon as I saw it on Pinterest, I said to myself, "I can make that."


If you follow the arrow you'll see a studded case for a laptop. Since my Kindle case was getting a lil' battered and is quite bulky I think it was time for an upgrade.


With all the vinyl and leather I have laying around from other projects I decided to use some of that plus some gold rivets I had leftover from making my card cases. Add pattern paper, a ruler, an ore, a pencil and a pair scissors.Time to get started.


I made a quick pattern by laying my Kindle on the pattern paper and creating a box around it. I added  1/4" seam allowance so I can add the rivets without the case being too tight. I then cut two out pieces of fabric and on one I cut out a decorative semicircle with a bottle cap for the front. I then laid both pieces of fabric on top of one another and took my ore and started making holes all around the border of the 3 sides of the fabric . The top half where the Kindle would slip in I left alone.


Now it's time to make some noise aka time to put in the rivets and hammer them together.


Ten minutes later. All the rivets are in.


It looks like a perfect fit and I got it right on the first try. Yay!


All done and if I say so myself. It came out perfect. Pinterest, I tell you, must stay off of there. (Note: This case lasted one day with me because I'm never satisfied. It was too flimsy for me with it being vinyl. I needed something more sturdy. I ended up making a sewn leather version the next day. You might see that on our next What's on My Bench. Let's just say it took multiple attempts to get right and my aunt request one for her iPad Mini.)


Gaetana is always busy with one project or another. If you want to learn more about Gaetana, please visit her shop, SatinDollCo.

Please return next week for another episode of What's on My Bench???

Thursday, December 17, 2015

Quick n' Easy Lemon Cookies

Our JETTEAM resident baker Gaetana, from SatinDollCo, has shared her recipe for Lemon Cookies today. They look yummy.

"I love baking and especially cookies during the holiday season. This is a twist on  your traditional lemon cookies. Quick and easy and super fun for kids too."

Let's start with the ingredients:


- 1 pk lemon cake mix
- 2 eggs
- 1/3 cup of vegetable oil
- 1 teaspoon lemon extract (I substituted the extract for real juice from half a lemon)
-  zest of one lemon (not in the original recipe)
- 1/3 cup of confectioners sugar


Preheat your oven to 375`. Pour the cake mix into a large bowl. Stir in eggs, oil, lemon juice and lemon extract until well blended. Yours should look like the picture shown below.


(Note: It might seem kind of thick that's exactly how it's supposed to be) Put your confectioners sugar in a separate bowl. Take a teaspoon or even a melon baller and take a scoop of dough. The smaller it is, the better.


As you can see,  I took a big teaspoon full of the dough. Don't do what I did!!

Take your clean hands and roll the dough in the confectioners sugar until fully coated and in the shape of a bowl. Once sugared,  put on an ungreased cookie sheet.


Bake for 6-9 minutes in preheated oven. The bottoms will be light brown and the inside chewy.


Let cool and enjoy.
------------------------------------------------------------------------------------------------------------------------


Gaetana

SatinDollCo 

Saturday, December 12, 2015

What's on My Bench???

Today's episode is from JET member Gaetana Parris of Satin Doll Co. She is going to talk about something we jewelers frequently get requests to do; repairs.

From time to time, I get random pieces of broken jewelry or just plain beads from family members. It's pieces that they may have gotten while traveling or something they pick up in a store. With me making and selling jewelry they find their way to me so I can fix it for them. Saves them money and the piece gets to live another day. 

That happened a couple of weeks ago. My aunt and uncle stopped by for a visit and my aunt finally brought with her the bracelet she has been telling me about that needed to be fixed.I would have had a picture of what she bought me but I left her for a minute or two and told her to hold it but, came back to a handful of beads. lol 

The beads were originally strung on with black jewelry cord. Since she's going to moving around a bit and won't be taking it off I opted for the repair, to use durable stretch cord.


So I busted out my pliers and got to work.


I first strung up the beads and put the biggest bead in the middle as per the original design.


I then knotted it to secure the beads. Just in case it breaks at the beginning again, the rest won't come apart.


I then add the oblong bead and knotted the stretch cord several times and cut the excess stretch cord.


Wallah, all done. A quick fix. Back to my auntie it goes.

Gaetana is certainly multi-talented and her family keeps her busy as her articles have shown! If you want to learn more about Gaetana, please visit her shop, Satin Doll Co.

Please return next week for another episode of What's on My Bench???

Thursday, December 10, 2015

Baked Cranberry Sauce

Today's blog feature was contributed by Phylly of SendingLove Gallery and LovesVintageDelights.
 
I had a full oven this Thanksgiving, so we made cranberry sauce from whole cranberries simmered on the stove.  For Christmas we will use this wonderful baked cranberry sauce. It’s so easy, and the cranberries don’t pop out of the pot and make a mess, which can happen when you cook them on the stove.
 
Baked Cranberry Sauce
Preheat oven to 350 degrees
3 c. fresh washed cranberries
1 c. sugar  (We use ¾ cup of coconut sugar, which tastes like brown sugar. If you want to try it, it’s available at Trader Joe’s, Sprouts, & Whole Foods)
--------------------------------------------------------------------------
Put the cranberries in an ungreased casserole that has a lid.
Sprinkle the sugar over them but do not stir.
Cover and bake for 35 minutes and stir 3 times while cooking.
This is good hot, or cold.
 
To keep the holiday spirit going, here’s a selection of jewelry from the Jets to wear or give as gifts to make any girl’s holiday bright!


Saturday, December 5, 2015

What's on My Bench???

Today's episode is from JET member Phylly of SendingLoveGallery and LovesVintageDelights. She is going to talk about how the two shops relate to each other.


I work primarily with gemstones and art glass to make jewelry for my shop SendingLoveGallery at Etsy, but I also enjoy “repurposing” and “upcycling” vintage components into “new” handmade jewelry. While looking through potential stock for my vintage shop, LovesVintageDelights, I often find necklace strands, earrings and brooches that are broken or not in good enough condition to put in the shop. From these I harvest the beads and the findings that are still good and try to re-use them in a new creation.  Here’s what’s on my bench, waiting to recycle.


Some are single pieces that may become a necklace pendant.
In a few cases I’ve already found a group of vintage earring clusters that will become a bracelet, like the group of white and gold earrings on the jewelry board above, almost ready to go!  Here are some more candidates for a bracelet:


These aurora borealis crystal pieces came from mid-century earrings. After removing the broken clip backs with pliers I’ve secured each cluster to a silver metal backing. They will likely be the focal point of a necklace when I find the right crystals to form the necklace strand.


Here’s an example of some of the backings I use to make bracelets and necklaces. Some work as trays for domed back  earring clusters. Other times, a flat finding is best. The gold tone circular findings with a rounded back work to fit buttons that have a shank. The large floral piece used to be a brooch that I’ve set in a gold tone tray like the largest one in the photo. I’m thinking it will be the focal for a bracelet when I find the right vintage beads to go with it.


These are vintage dress clips. I’m planning to use the vintage glass beads from the broken necklace above them to make chain necklaces using the clips as pendants. The clips have been waiting for a long time until I found just the right shade of old glass beads that harmonize with the slightly yellow vintage rhinestones.


The last photo shows another vintage dress clip and some possible crystal beads to go with it. They happen to be modern glass. Also there are 2 vintage black buttons on the left that I plan to make into dangling earrings.


I’m hoping to get some of these re-styled, eco-friendly jewelry creations into my shops before Christmas. Please come and see! I plan to have the pieces featuring vintage glass in SendingLoveGallery in the section “vintage art glass jewels." The pieces featuring vintage earring clusters and buttons will go to LovesVintageDelights in the section “upcycled vintage jewelry."

Please return next week to see What's on My Bench???

Thursday, December 3, 2015

Swedish Meatballs in Gravy with Noodles Prepared in a Crock Pot

This week's blog post was contributed by Michele of malves1009. She is sharing her mom's recipe for Swedish Meatballs.


"With the colder weather coming, we look for comfort food. My mom used to make this and it sure was a treat.   It would make the house smell so yummy.  I make this for my family now. I hope you enjoy it."
 

Here are the ingredients needed to make this awesome dish:


Meatballs
 
1/2 cup seasoned bread crumbs
 
1/2 cup finely chopped onion
 
1 teaspoon minced garlic
 
1/4 tsp nutmeg 
 
1/3 cup parsley
 
salt/pepper to your liking
 
1/2 cup milk
 
1 tablespoon Worcestershire sauce
 
3/4 pound lean ground beef
 
1/2 pound lean ground turkey; you can use pork instead.
 
1 large egg beaten
 
 
**Mix all ingredients and form small meatballs, then set aside.
 
 
Gravy
 
 
1/4 finely chopped onion
 
1 Cup of vegetable or chicken broth
 
1 can of cream of mushroom soup
 
1 1/2 cups of water
 
1 tablespoon Worcestershire sauce
 
1 pkg of brown gravy mix, or McCormick Swedish Meatballs gravy packet.
 
Mix together well in crock pot, then add the meatballs making sure gravy gets over all the meatballs.
 
Cook on low for 6 hours.
 
After 2 hours add 1 tablespoon of flour to thicken gravy (to your liking).
 
1 hour before finished, I add fresh sliced mushrooms  Mix well.
 
 Prepare your noodles on your stove top.
 
Place in serving dish and add the meatballs with gravy. Sprinkle parsley over the meatballs.