
In
my “real life,” I’m the Managing Editor of Lapidary
Journal Jewelry Artist. And one of my favorite parts of the job is hosting
our occasional online webinars. I learn some of the most fascinating things!
Recently, we had a webinar on how to apply “non-toxic” patina to metal jewelry.
And now I’m hooked!
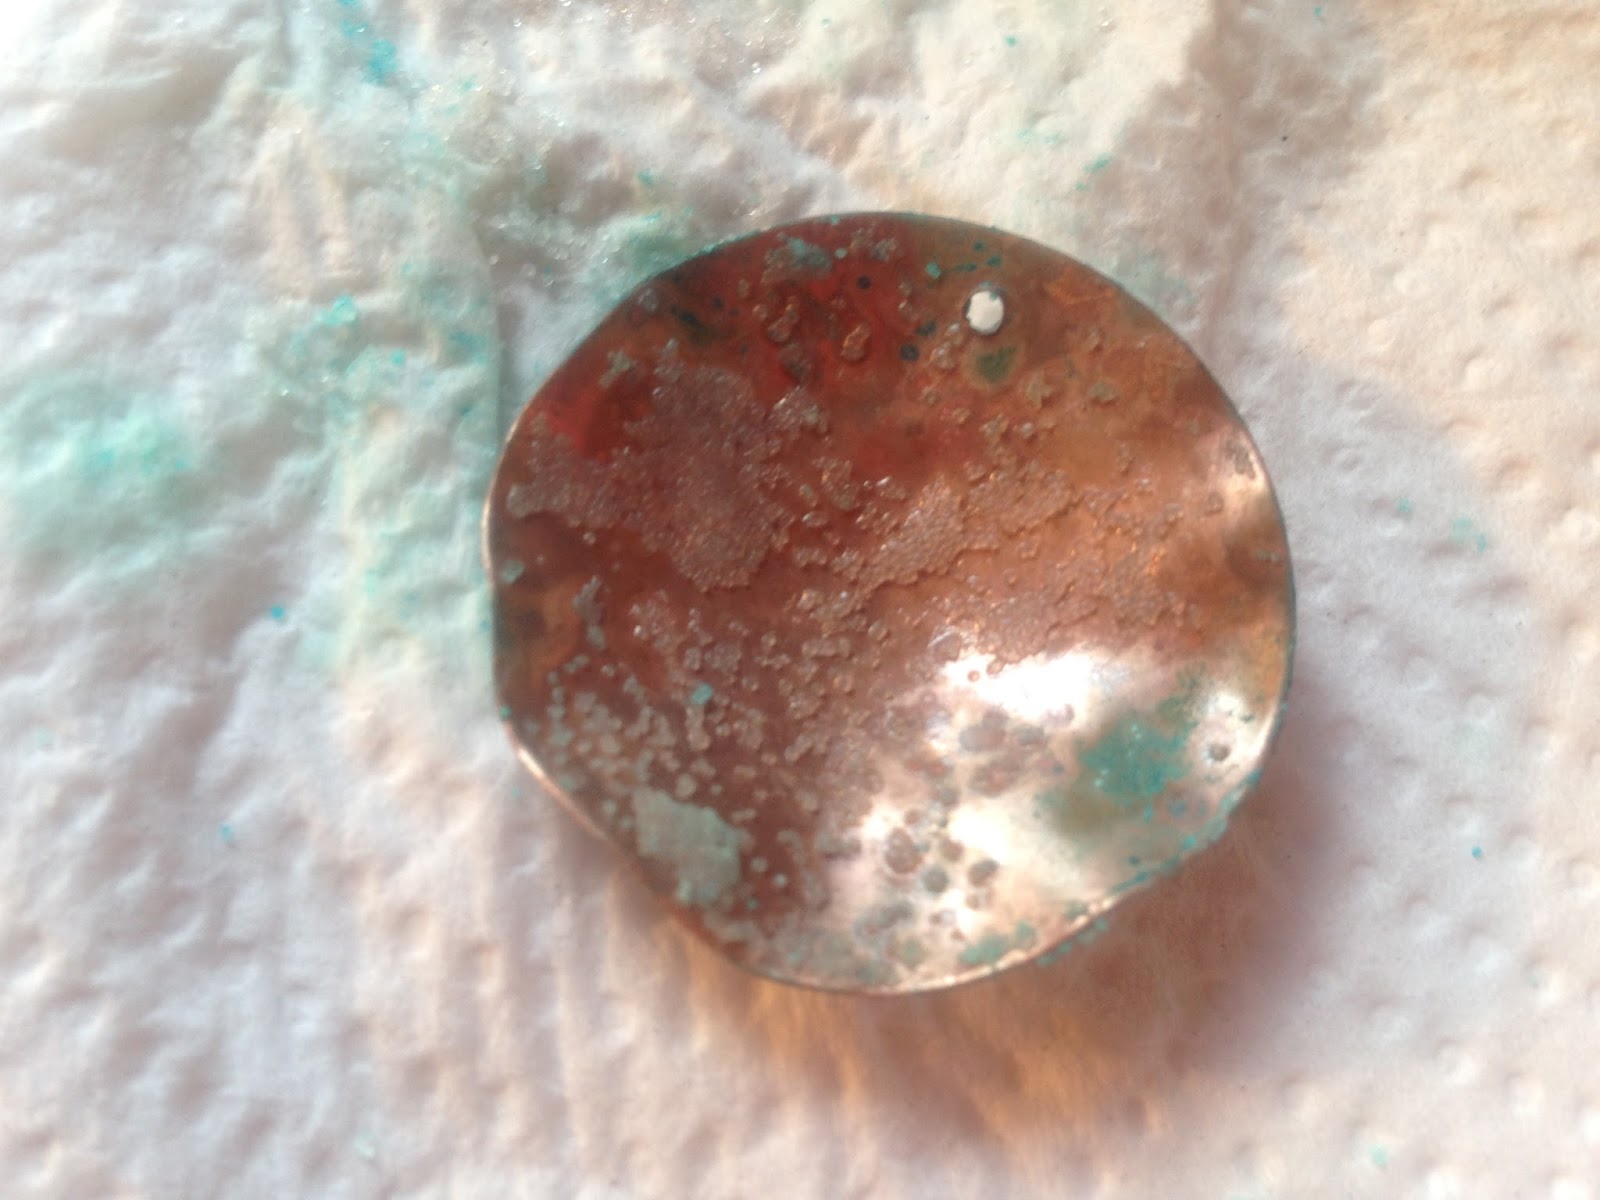
I
was playing with copper blanks the other day and came up with a couple of
pendants. One is a rather “amorphous” shape that came about when I was playing
with my dapping block and hammers.

 For the other, I cut a disk out of the blank
(with my beloved disk cutter), domed the disk, and riveted it back onto the
blank. Then I punched holes in it each for jump rings. Both pendants would have
been fine on their own, and I could have stopped at this point, but I decided
to add a verdigris (blue-green) patina to them, using the salt-and-vinegar
technique I learned in the webinar.
For the other, I cut a disk out of the blank
(with my beloved disk cutter), domed the disk, and riveted it back onto the
blank. Then I punched holes in it each for jump rings. Both pendants would have
been fine on their own, and I could have stopped at this point, but I decided
to add a verdigris (blue-green) patina to them, using the salt-and-vinegar
technique I learned in the webinar.
What’s
the great thing about this technique? Almost everything you need to do it with is
probably already in your kitchen! And it’s simple.Just mix vinegar and salt —
there are a lot of different “recipes” for this, but I like the “3+3” mixture
of 3 tablespoons of vinegar and 3 teaspoons of salt. Mix them in a small,
shallow dish. I use an old coffee cup. It makes the mixture deep enough to
cover my piece without wasting vinegar. Stir the mixture until the salt is
“almost” all dissolved.
Make
sure that your metal is very clean. I wash the copper with plain ol’ dish soap.
Blot it dry with paper towel.

Then sprinkle baking soda over both sides of the piece and rub it in with steel wool, rubbing with the grain of the metal. (Be careful to hold your piece by the sides to avoid getting fingerprints on it.)
 Rinse the baking soda off thoroughly. Blot the piece dry, and then drop it in
your salt and vinegar. Let it sit for at least ½ an hour. (You might like to
leave it longer. It’s your preference. Just experiment!)
Rinse the baking soda off thoroughly. Blot the piece dry, and then drop it in
your salt and vinegar. Let it sit for at least ½ an hour. (You might like to
leave it longer. It’s your preference. Just experiment!) Take
your piece out of the mixture and set it on two or three pieces of folded paper
towel. Don’t dry it! You want your metal to air dry at this point. That’s where
the patina comes from. You will see salt crystals on your wet metal. That’s
good! You want that. In fact, you may want to sprinkle a little more salt on
your piece. (Again, experiment!) This is where my little snowman salt shaker
comes in handy. If you add more salt, you only want a little.
Take
your piece out of the mixture and set it on two or three pieces of folded paper
towel. Don’t dry it! You want your metal to air dry at this point. That’s where
the patina comes from. You will see salt crystals on your wet metal. That’s
good! You want that. In fact, you may want to sprinkle a little more salt on
your piece. (Again, experiment!) This is where my little snowman salt shaker
comes in handy. If you add more salt, you only want a little.
Now
comes the really hard part — at least it is for me. Leave it alone! Oh, it’s
tempting to play with it, but the longer you leave your piece alone, the better
the patina becomes. You might want to turn it over a couple of times to expose
both sides to the air (and just to sneak a peek at what both sides are doing),
but you should leave it alone for several hours. Overnight is best, but it
depends on how much patina you want on your piece.


After
your piece has a lot of patina on it, you’ll need to seal it. If you don’t, the
salt will just keep working, eating into the metal and flaking off. I use a
spray-on lacquer (the only ingredient in this technique that I don’t keep in my
kitchen). Trying to rub on waxes or brush on lacquer (like clear nail polish)
will work but will remove too much of the patina. Some of the patina will, in
fact, come off with the spray-on lacquer, so you should always let more patina
build up than you’ll actually want on the finished piece.

For
my two pendants, I added jump rings, leather cord, and lobster claw clasps. And
I had two lovely new pieces of jewelry — straight from the kitchen cupboard!


If you would like to learn more about Karla, go to KarlaKraft. Remember to come back next Saturday for the next installment of What's on My Bench!


