Saturday, October 3, 2015

What's on My Bench?

This week's episode is from JET member Jennifer of WearablebyDesign.

I'm between projects right now. I've just finished up several rings and am going to start a new one. This new ring will be complex and might take awhile. After finishing several projects in a row, and before starting a new one, I always do two things: Clean and Reorganize my bench.

So today, I'm going to show you my Clean and Reorganize procedures. This is a more of What's in My Bench than a What's on My Bench.

First, I pull out all previous half started projects and reassess if I'm likely going to 1.) finish them  or 2.) go in a different direction with them  or 3.) scrap them.


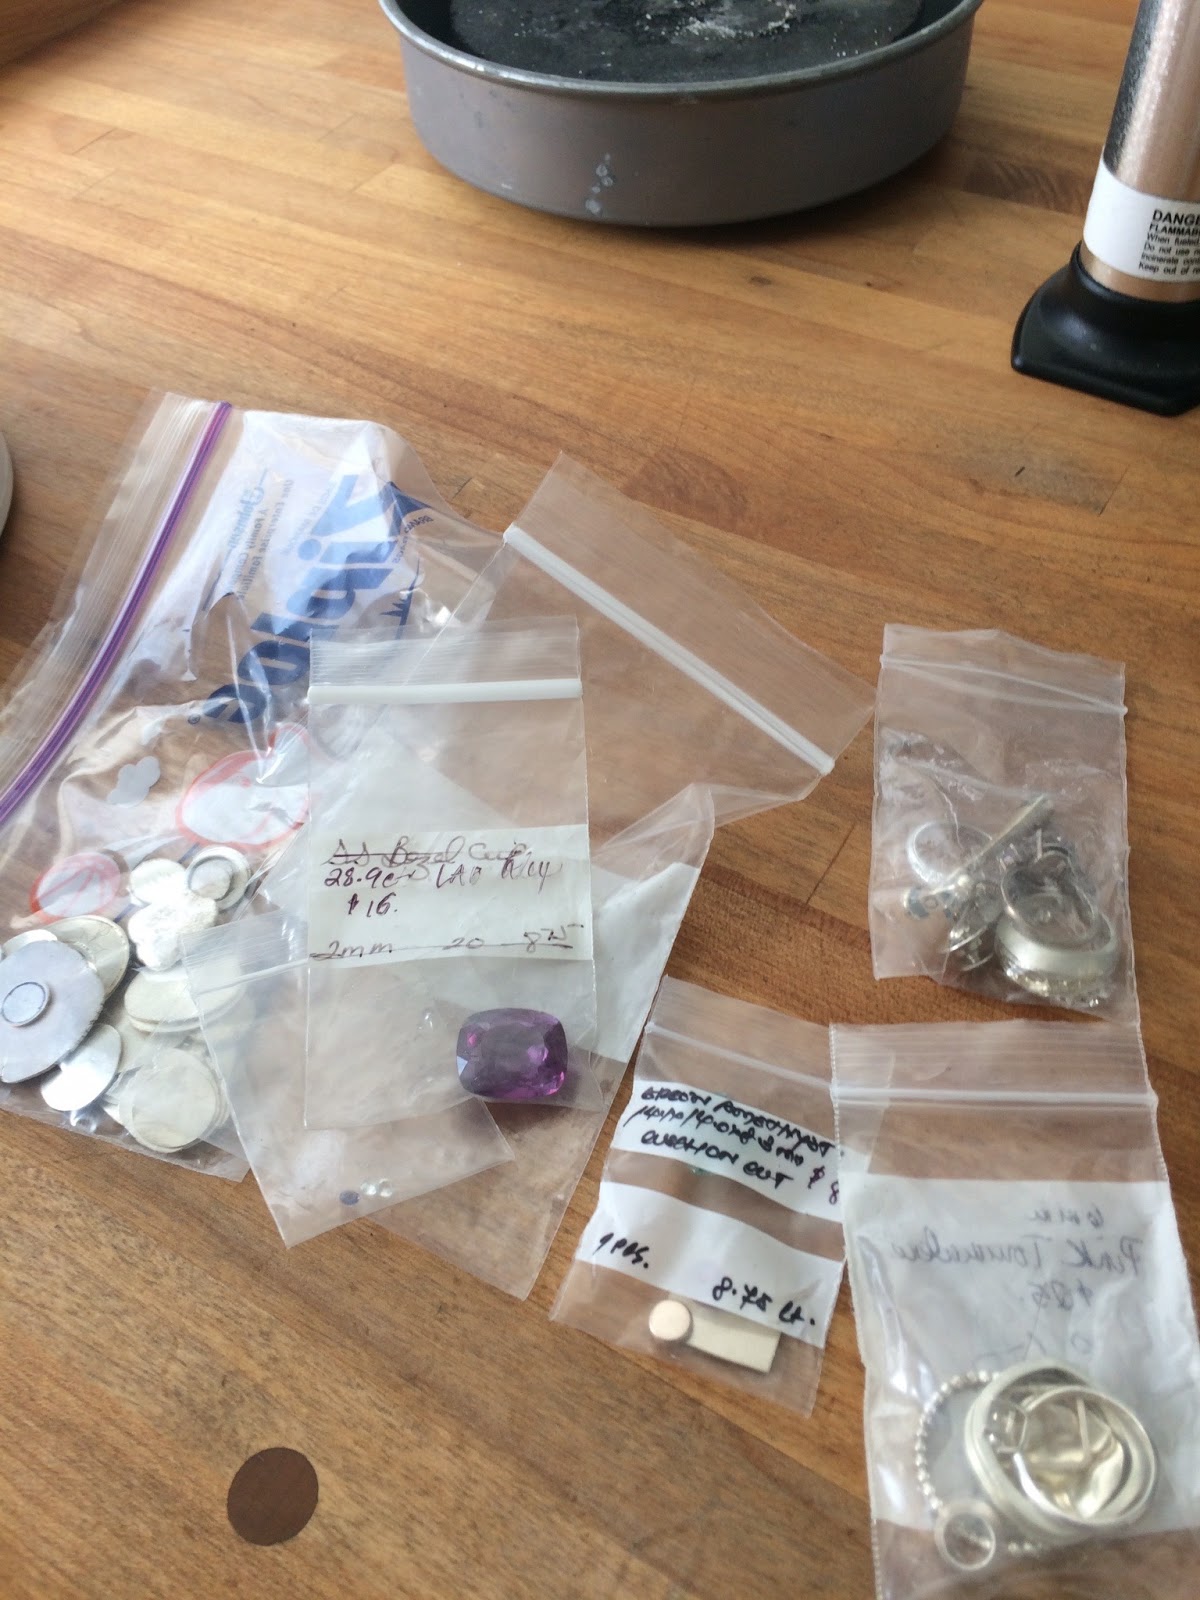
If there are gems involved, and I'm not going to finish them, then I have to replace the gems into the Gems Box.


Next, I tackle the contents of the pan (the metal lined tray in the center of the bench). I begin by marking a ziplock bag with the contents. I usually have sterling silver, silver sweeps (dust), or gold. When working with gold, I always do the pan clean up before I start so I can collect the gold and gold dust separately. I never let it mingle with the silver scrap.


Invariably there is other junk in the pan. If it's easy to pick out - like broken drill bits or copper scrap, I do that first. Then I pick out all the sterling silver bits. The rule is if I can pick it up with a pair of tweezers, it's considered scrap and not sweeps. Lastly,there's the dust. I collect it into a small pile, then I sift it through a fine mesh sieve. This helps remove the bits of stuff that is definitely not silver dust.


Lastly, I make a trip to my friendly neighborhood refiner and he gives me a bit of cash for my efforts!

If you would like to learn more about Jennifer go to WearablebyDesign. Remember to return next week for another episode of What's on My Bench!


Thursday, October 1, 2015

Making Bead Caps for Your Jewelry Designs

 
Today's blog post was contributed by BrookeScarboroughJewelryDesigns . Brooke is another one of the members of the Jetteam on Etsy.
 
~~~~~~~~~~~~~~~~

Jewelry can be made more interesting by all the little elements that you include in the design. Of course all of these elements can add up in cost too. If you have the right tools on hand you can make some of your jewelry findings yourself. I'm going to explain how to make your own bead caps.

You'll need some sheet metal in 20 gauge or thinner in the material you want to use. My photos show examples of an embossed sterling sheet and some scrap copper sheet I had on hand. You can purchase textured sheets or make your own with a hammer or just use plain sheet.


Next you'll want to cut out discs in the appropriate size. I used a tool shown with the blue handle called a Power Punch by Euro with it's 9/32" punch. These come with a handy center punch built in so you can drill the center. Or you can use a disc cutter and a center punch. Drill a hole in your disc large enough to fit the wire that you will be using. A rule of thumb for choosing a bead cap size is to determine how much of the bead you want to cover. 


The next step is to dome the disc to a depth that will fit the bead you will be capping. For this, you will need a dapping block with punches and a hammer. You can see I've finished a few of my sterling silver bead caps with the embossed pattern.

Below are a finished pair of earrings using the bead caps I made on the top of the beads with scalloped bead caps below. By the way, I found capping this large rondelle shaped bead challenging. I think round beads might be easier to cap with this type of bead cap.


Seafoam Green Amazonite Hoop Earrings

There are many ways that you could customize the bead caps, like adding a creative edge with a file, adding textures on the surface, or try overlapping different sizes and metals. Make some prototypes in copper before making them in silver if you are unsure of your size and when trying out new textures or depths.

I hope you can use these tips the next time you are designing some jewelry that needs that extra "something".

Here are some examples of jewelry utilizing different types of bead caps in interesting ways:


Brooke, Jewelry Designer

Saturday, September 26, 2015

What's on My Bench?

Today's feature is brought to us by JET member, Jetling (new JET), Karla Rosenbush of KarlaKraft.

In my “real life,” I’m the Managing Editor of Lapidary Journal Jewelry Artist. And one of my favorite parts of the job is hosting our occasional online webinars. I learn some of the most fascinating things! Recently, we had a webinar on how to apply “non-toxic” patina to metal jewelry. And now I’m hooked!

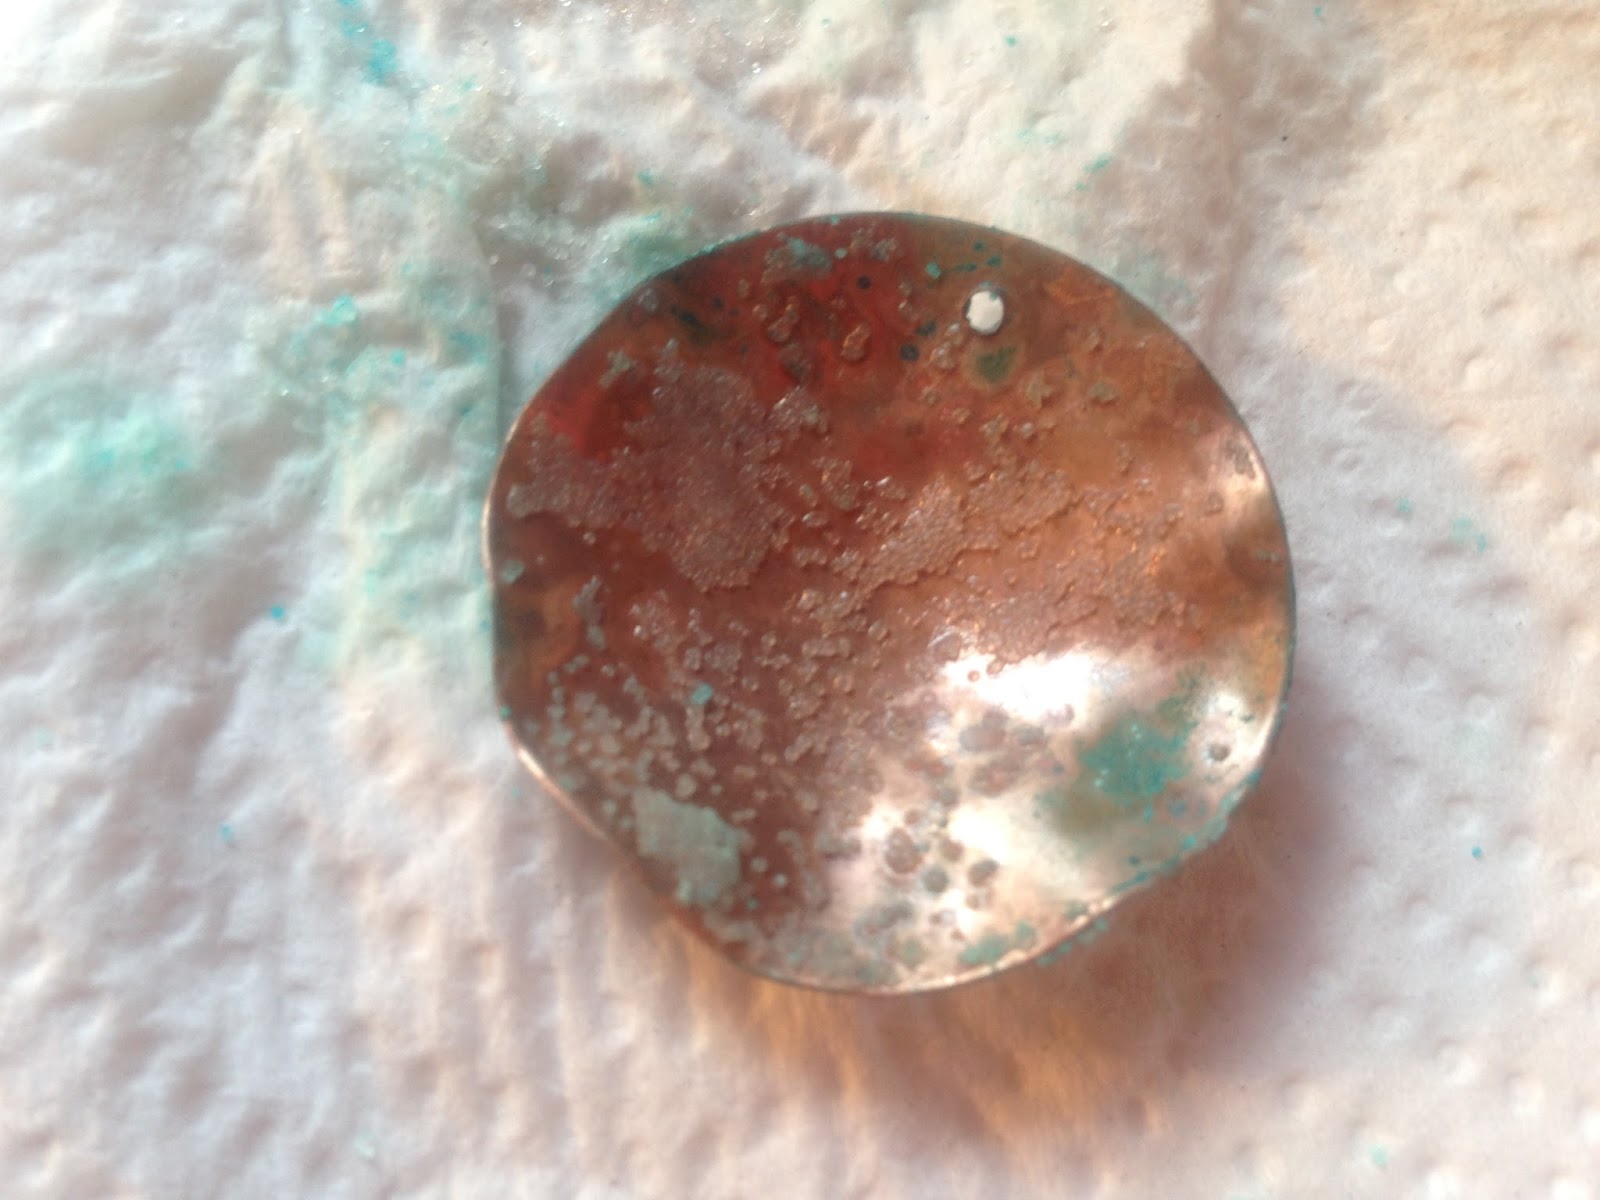
I was playing with copper blanks the other day and came up with a couple of pendants. One is a rather “amorphous” shape that came about when I was playing with my dapping block and hammers. 


For the other, I cut a disk out of the blank (with my beloved disk cutter), domed the disk, and riveted it back onto the blank. Then I punched holes in it each for jump rings. Both pendants would have been fine on their own, and I could have stopped at this point, but I decided to add a verdigris (blue-green) patina to them, using the salt-and-vinegar technique I learned in the webinar.


What’s the great thing about this technique? Almost everything you need to do it with is probably already in your kitchen! And it’s simple.Just mix vinegar and salt — there are a lot of different “recipes” for this, but I like the “3+3” mixture of 3 tablespoons of vinegar and 3 teaspoons of salt. Mix them in a small, shallow dish. I use an old coffee cup. It makes the mixture deep enough to cover my piece without wasting vinegar. Stir the mixture until the salt is “almost” all dissolved.


Make sure that your metal is very clean. I wash the copper with plain ol’ dish soap. Blot it dry with paper towel. 

Then sprinkle baking soda over both sides of the piece and rub it in with steel wool, rubbing with the grain of the metal. (Be careful to hold your piece by the sides to avoid getting fingerprints on it.)

 Rinse the baking soda off thoroughly. Blot the piece dry, and then drop it in your salt and vinegar. Let it sit for at least ½ an hour. (You might like to leave it longer. It’s your preference. Just experiment!)


Take your piece out of the mixture and set it on two or three pieces of folded paper towel. Don’t dry it! You want your metal to air dry at this point. That’s where the patina comes from. You will see salt crystals on your wet metal. That’s good! You want that. In fact, you may want to sprinkle a little more salt on your piece. (Again, experiment!) This is where my little snowman salt shaker comes in handy. If you add more salt, you only want a little.


Now comes the really hard part — at least it is for me. Leave it alone! Oh, it’s tempting to play with it, but the longer you leave your piece alone, the better the patina becomes. You might want to turn it over a couple of times to expose both sides to the air (and just to sneak a peek at what both sides are doing), but you should leave it alone for several hours. Overnight is best, but it depends on how much patina you want on your piece.


After your piece has a lot of patina on it, you’ll need to seal it. If you don’t, the salt will just keep working, eating into the metal and flaking off. I use a spray-on lacquer (the only ingredient in this technique that I don’t keep in my kitchen). Trying to rub on waxes or brush on lacquer (like clear nail polish) will work but will remove too much of the patina. Some of the patina will, in fact, come off with the spray-on lacquer, so you should always let more patina build up than you’ll actually want on the finished piece.


For my two pendants, I added jump rings, leather cord, and lobster claw clasps. And I had two lovely new pieces of jewelry — straight from the kitchen cupboard!


If you would like to learn more about Karla, go to KarlaKraft. Remember to come back next Saturday for the next installment of What's on My Bench!

Thursday, September 24, 2015

TAKING THE NEXT SALES STEP

Our feature this week was contributed by Karla Rosenbusch, one of our newest Jetteam members. Her awesome jewelry can be found in her shop, KarlaKraft.
 
 
When it comes to jewelry making, I’ve always considered myself a relatively advanced hobbyist. In my “real life,” I’m an editor at Lapidary Journal Jewelry Artist, so I’m exposed to the best of the best of jewelry artists on a daily basis. And so, I feel that I’m more of a “dabbler.” I’ve had an Etsy store for several years, and while I enjoy it a lot, I’ve never been able to devote a tremendous amount of time to it. (That “editor” thing again. Silly job.)


But lately, I’ve branched out from stringing together pretty stones (I adore pretty stones) to doing cold-connected and riveted metalwork. And it’s been very well received -- so well, in fact, that I recently received an invitation to sell my jewelry at a craft show. Great, right? Scary, actually! I’ve never done a craft show before, so I’m a little freaked out. This will definitely be a big step for me.


Fortunately, my job as an editor gives me access to some of the best experts in this area, and they’ve given me awesome advice – on what and how much jewelry to bring, how to set up a good display, how to process any “legalities,” and how to get organized before and during the show.


So I had a graphics designer friend of mine design an awesome sign. I also had some business cards designed and professionally printed. I planned out how to set up my display – with pretty tablecloths, stands for necklaces and earrings, and multiple levels. I also got some nice-looking price tags and some pretty (and inexpensive) gift bags. So I think – I hope – that I’m just about ready for the craft show on October 3.


As for my jewelry, I’ve been busily creating new pieces. Following the advice of one of my experts, I’m not bringing everything. I decided to concentrate on three different types of necklaces – riveted copper pendants with salt-and-vinegar patina, my riveted metal pendants with focal stone or glass cabochons, and the pendants I make from recycled aluminum soda and beer cans. (My prediction? The recycled can pendants will be the most popular because people just love them. But my favorites are the copper ones with patina because the technique used to make them is just SO cool.) I’m also going to bring earrings that go with and complement the pendants.


Oh, and the best thing about this particular show? It’s the annual Fall Apple Festival at my church where people (theoretically) like me. Or at least, they’re “supposed” to. So I figured it was a good way to start selling at craft shows. I may get some sympathy sales from my fellow choir members!

Saturday, September 19, 2015

What's on My Bench?

Today's edition of is from JET team member Wanda of GemstonesonMyMind.


I’m working on a pair of Copper and Turquoise earrings.  I love Copper and Turquoise, so it’s a combination I work with often.  I’ve sketched a quick design that appeals to me, and hopefully to others. 


I’ve gathered the supplies needed for a pair of dangly, boho style Copper and Turquoise earrings.    I’m using some copper washers from Amazon that I bought just for the purpose of creating chandeliers for the pair. 


First, I’m going to give the washers a hammered texture that will make them sparkle, sort of like facets.  Each little ding of the hammer is going to reflect the light and make them look like they didn’t come from the hardware department.  After I’ve hammered them, I’ll file the edges smooth so as not to cause any discomfort to the wearer.


Now it’s time to make the dangle charms that will hang from the new rings.  The Turquoise I’ve chosen is small blue green heishi beads and I’ll be accenting them with small Copper spacer beads that I picked up at a bead show.  I chose 6 copper ball pins to use for wiring the charms.  To give them a different look, I’ve hammered the ball on the end of the headpin into a flat disc.   After wiring them into a charm, I attach them to the “copper washer” chandelier with jump rings, using a larger one for the center to let it dangle a little lower.  As for the jump rings used to attach it to the ear wires, I hammered them also.


So now the earrings are finished, and I think I like them, which means I need to keep this pair and make some for the shop!


Remember to return next week for another episode of What's on My Bench. If you want to learn more about Wanda, please visit her shop, GemstonesonMyMind. Until next week!